
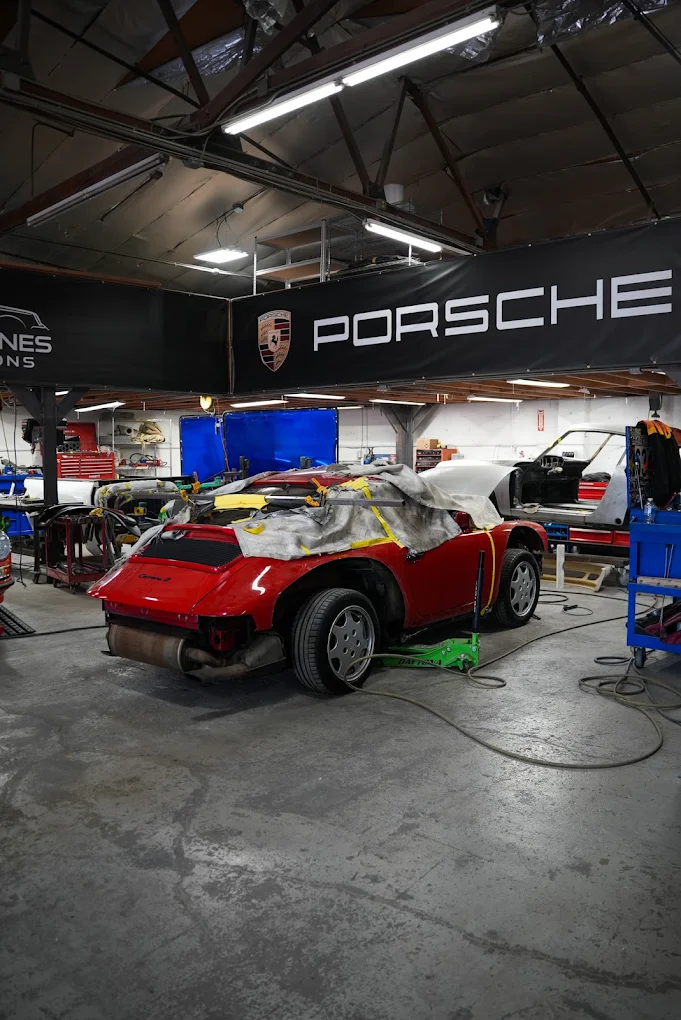
Many enthusiasts are surprised to learn that the visible transformation happens only after countless hours of inspection, disassembly, repair, and preparation. The final paint and polished trim may capture everyone’s attention, but the real work takes place behind the scenes.
Understanding each stage of the restoration process helps owners appreciate why quality restorations require time and why every step contributes to the finished result. It also helps set realistic expectations. A Porsche that looks tired on the outside may hide decades of wear in places most people never see, and a careful restoration has to address all of it, not just the obvious flaws.
Step 1: Comprehensive Inspection and Evaluation
Every restoration begins with a detailed inspection.
Before removing a single part, technicians carefully assess the vehicle’s overall condition. This includes evaluating the body, chassis, drivetrain, suspension, electrical system, and interior. On a Porsche, that first look often reveals more than expected because these cars were engineered with precision, which means small issues tend to stand out once the car is examined closely.
The inspection typically identifies:
- Structural rust
- Previous accident repairs
- Missing components
- Mechanical wear
- Electrical concerns
- Interior deterioration
- Paint condition
This evaluation forms the foundation for the entire restoration plan.
I’ve noticed that many first-time owners focus mainly on visible paint or interior damage. In reality, some of the most significant restoration challenges are hidden beneath carpets, inside body cavities, or behind mechanical components that appear fine from the outside. A car can look complete and still need extensive work once the underbody, suspension points, or inner panels are exposed.
A good inspection also helps determine what should be preserved. Not every original part needs to be replaced. Sometimes a factory component can be cleaned, repaired, or rebuilt and still serve the car well. That balance between preservation and replacement is one of the things that separates a thoughtful restoration from a simple rebuild.
Step 2: Careful Documentation
Before disassembly begins, experienced restoration teams document the vehicle thoroughly.
Photographs, measurements, labels, and detailed notes help preserve important information for later reassembly. This stage may seem tedious, but it saves enormous time later. A Porsche restoration often involves dozens of small parts that look similar at first glance but differ in subtle ways. Without documentation, those details can become frustrating guesswork months later.
Documentation often includes:
- Exterior panel alignment
- Wiring routes
- Hardware locations
- Interior assembly
- Trim placement
- Mechanical configurations
It is also helpful to record part numbers, date codes, paint codes, and any factory markings that may matter during reassembly. On classic models, those details can help preserve authenticity and guide sourcing decisions if replacement parts are needed.
One practical habit I always recommend is photographing each assembly from multiple angles before removal. A single wide shot is useful, but close-up images of brackets, clips, and routing paths often become the most valuable references later.
These records help ensure accuracy throughout the project and reduce the risk of overlooking small but important details.
Step 3: Complete Disassembly
A proper Porsche restoration generally involves taking the vehicle apart far beyond what many owners expect.
Major components removed may include:
- Engine
- Transmission
- Suspension
- Glass
- Trim
- Interior
- Wiring
- Body panels where appropriate
Disassembly allows technicians to inspect every section of the vehicle individually rather than working around hidden components. It also gives them the chance to clean and evaluate each part on its own, which is especially important when corrosion or previous repairs may have been masked by layers of assembly.
Organization becomes extremely important during this stage to simplify later reassembly. Fasteners should be sorted, labeled, and stored carefully. Original clips, brackets, and trim pieces should be separated from replacement parts so nothing gets mixed together.
Insider tip: Keep one container specifically for original hardware, even if you plan to replace some of it. Those pieces can be useful as references for finish, thread pitch, and factory fitment when the car goes back together.
Disassembly is also the stage where patience matters most. Old fasteners can be brittle, trim can be delicate, and hidden clips can break if rushed. A careful approach protects parts that may be difficult or impossible to replace.
Step 4: Structural Repairs and Rust Removal
Once the vehicle has been disassembled, hidden damage often becomes visible.
Rust repair remains one of the most significant aspects of many classic Porsche restorations. On older cars, corrosion can appear in obvious places like floor pans, but it often spreads into less visible areas such as seams, inner fenders, and mounting points. If those areas are not repaired correctly, the finished car may look beautiful but still suffer from structural weakness.
Technicians inspect areas such as:
- Floor pans
- Rocker panels
- Suspension mounting points
- Wheel housings
- Battery compartments
- Door structures
Whenever possible, damaged metal is repaired using methods that preserve structural integrity while maintaining the vehicle’s original design. In some cases, that means fabricating sections by hand. In others, it means replacing a panel section with a properly fitted reproduction or OEM-style part.
The goal is not simply to remove rust. It is to restore the shape, strength, and alignment of the body so the car behaves as intended once it is back on the road.
This is also where a careful eye makes a major difference. A patch that looks acceptable from a distance may still create problems if it changes panel contour or leaves weak seams behind. Good metalwork should disappear into the car, not announce itself.
Step 5: Mechanical Restoration
Attention then shifts to the vehicle’s mechanical systems.
Depending on the condition of the Porsche, restoration may include rebuilding or refurbishing:
- Engine components
- Transmission
- Brakes
- Steering
- Suspension
- Fuel system
- Cooling components where applicable
The goal is dependable operation while preserving the driving characteristics that made the vehicle special when it was originally built. That is especially important with Porsche, where the driving feel is part of the car’s identity. A restored car should not only start and stop properly; it should feel balanced, responsive, and mechanically honest.
This stage often reveals how interconnected the systems really are. A tired suspension can make a car feel loose even if the engine is healthy. Old brake hoses can affect pedal feel. Fuel delivery issues can mimic ignition problems. Experienced restorers look at the car as a whole rather than treating each symptom in isolation.
Insider tip: During engine disassembly, experienced restorers carefully inspect hardware and original fasteners rather than automatically replacing everything. Factory components often provide better fit and authenticity when they remain structurally sound.
It is also wise to evaluate seals, bushings, mounts, and hoses with the same level of attention. These parts may not be glamorous, but they influence drivability more than many owners realize.
Step 6: Body Preparation
Before paint can be applied, the body must be carefully prepared.
This stage involves:
- Panel alignment
- Dent repair
- Metal finishing
- Primer application
- Block sanding
- Surface inspection
Preparation often requires multiple rounds of sanding and refinement to achieve straight, uniform body panels. On a Porsche, where the body lines are clean and purposeful, even a slight wave in the panel can become noticeable under fresh paint. That is why body preparation is often the most time-consuming part of the visual restoration process.
Professional restorers understand that the quality of the final paint depends almost entirely on the work completed during this phase. If the panels are not straight, the paint will not hide it. If the gaps are uneven, the finished car will still look off no matter how glossy the surface becomes.
A useful part of this stage is test fitting trim, lights, doors, and other exterior pieces before paint. That way, adjustments can be made while the body is still easy to work on. Once the finish is applied, every correction becomes more delicate.
Another detail worth mentioning is the use of guide coat during sanding. It is a simple technique, but it reveals low spots and uneven areas that are easy to miss by eye alone. Small methods like that often make the difference between a decent finish and a truly straight one.
Step 7: Paint and Refinishing
Painting is one of the most recognizable stages of restoration, but it follows extensive preparation.
Professional refinishing typically includes:
- Final cleaning
- Sealing primer
- Base coat application
- Clear coat application
- Controlled curing
- Careful inspection
Color accuracy and application consistency are especially important when restoring classic Porsche models where originality often matters. Some owners want a factory-correct appearance, while others prefer a slightly updated finish that still respects the car’s character. Either way, the paint should suit the body style rather than overpower it.
The objective is achieving a finish that complements the vehicle without distracting from its timeless design.
This stage also requires a clean environment and disciplined technique. Dust, overspray, and uneven curing can all affect the final result. Even a well-prepared body can be undermined by rushed application or poor environmental control.
According to the restoration professionals at perfect lines restoration, successful Porsche restorations are built on detailed planning, careful craftsmanship, accurate documentation, and consistent quality checks throughout every stage of the project rather than focusing solely on the vehicle’s final appearance.
That approach makes sense because paint is only as good as the surface beneath it. A flawless finish is really the result of many smaller decisions made long before the spray gun comes out.
Step 8: Interior Restoration
The interior contributes just as much to the restoration experience as the exterior.
Seats, carpets, dashboards, trim panels, and headliners are evaluated individually. On a Porsche, the cabin is part of the driving experience, so restoring it properly matters just as much as the bodywork. The smell, texture, and fit of the interior all shape how the car feels once it is finished.
Where possible, original components are restored.
When replacement becomes necessary, materials are selected carefully to preserve the vehicle’s authentic appearance. That may include matching grain patterns, stitching styles, or period-correct finishes. Even small details such as knob texture or switch appearance can influence the overall impression.
Small details—including stitching, texture, and trim finishes—play a surprisingly important role in the overall impression.
It is also worth checking the condition of insulation, wiring behind the dash, and mounting points for seats and consoles. These areas are easy to overlook, but they affect comfort, safety, and long-term durability.
Step 9: Reassembly
Reassembly is much more than reinstalling parts.
Each component is carefully fitted, adjusted, and tested before moving to the next stage. This is where all the earlier documentation pays off. The notes, photos, and labeled hardware begin to prove their value as the car starts to take shape again.
This includes:
- Electrical systems
- Glass installation
- Weather seals
- Trim alignment
- Suspension setup
- Interior assembly
Patience during reassembly helps ensure every system functions properly while maintaining factory-quality fitment. It is common for small adjustments to be needed along the way. A door may need to be shimmed slightly. A seal may need to be seated more carefully. A trim piece may need to be aligned before the next panel goes on.
Insider tip: Before installing final trim pieces, experienced technicians often verify the operation of electrical systems one final time. Accessing wiring becomes considerably easier before the last interior panels are secured in place.
Another practical habit is to test-fit delicate exterior pieces before final tightening. Fresh paint can be damaged easily, and a careful dry fit helps avoid scratches or unnecessary pressure on newly finished surfaces.
Step 10: Testing and Quality Control
Before considering the restoration complete, every major system undergoes inspection and testing.
This may include:
- Engine operation
- Brake performance
- Steering response
- Suspension function
- Electrical testing
- Fluid inspection
- Road evaluation where appropriate
Quality control ensures the restored Porsche not only looks exceptional but also performs with the confidence expected from a properly restored sports car. A car that starts in the shop but develops issues on the road is not truly finished. The final checks are what confirm that the restoration holds together in real use, not just under showroom lighting.
This stage often uncovers small adjustments that are easy to miss earlier. A slight fluid seep, a loose connector, or a minor alignment issue can usually be corrected quickly if caught now. That is why experienced restorers never treat the first test drive as the end of the process. It is part of the process.
Patience Is One of the Most Important Tools
Unlike routine repairs, Porsche restoration rarely follows a perfectly predictable timeline.
Each stage may uncover additional work that deserves proper attention before moving forward. A hidden rust pocket may require more metal repair. A mechanical component may need rebuilding instead of cleaning. A trim piece may be too fragile to reuse without restoration. These discoveries are normal, not signs of failure.
Experienced restorers understand that patience protects both craftsmanship and authenticity.
The finest restorations are rarely the fastest—they are the ones where every decision supports the long-term preservation of the vehicle. That mindset keeps the project grounded. It also helps owners appreciate why a careful restoration feels different from a quick cosmetic refresh. One is built to last. The other is built to look finished for the moment.
Final Thoughts
A Porsche restoration is a carefully structured journey that combines engineering knowledge, craftsmanship, and attention to detail. From the initial inspection and complete disassembly to mechanical rebuilding, body preparation, paint, interior restoration, and final testing, every step contributes to preserving the character and performance of these remarkable automobiles.
Understanding the restoration process helps owners appreciate the dedication required to return a classic Porsche to its former glory. With thoughtful planning, skilled workmanship, and respect for originality, a properly restored Porsche becomes more than a beautiful vehicle—it becomes a lasting piece of automotive history that can be enjoyed for generations to come.
Also read for more information so click here.
 admin
admin